

Every fall, pool owners with sand or DE filters get a fairly simple closing checklist – backwash, reassemble, done. If you have a cartridge filter, though, you’ve probably noticed the instructions are a little less clear. Do you leave the cartridge in? Do you drain the housing? What happens if you just… skip it?
Here’s the direct answer: winterizing an inground pool with a cartridge filter means removing and storing the cartridge element indoors, draining and storing the housing, balancing water chemistry, lowering the water level 4-6 inches below the skimmer, blowing out and plugging the lines, adding antifreeze to any lines that can’t be fully cleared, and covering the pool. This article walks through each of those steps in order, with specific numbers at every stage. As Teddy Bear Pools and Spas explains, skipping the filter step is one of the most common – and most expensive – closing mistakes pool owners make.
Step 1: Balance Your Water Chemistry First
Chemistry comes before anything mechanical. You want the water in the right range when it sits all winter, because imbalanced water will stain, scale, or corrode your pool surfaces even when nothing is running. Test and adjust to these targets before you close:
- pH: 7.2-7.6. Low pH etches plaster and eats vinyl liners; high pH causes scale deposits that are miserable to remove in spring.
- Total Alkalinity: 80-120 ppm. This buffers your pH from swinging wildly over the winter months.
- Calcium Hardness: 200-400 ppm for plaster pools, 175-225 ppm for vinyl. Too low and the water pulls calcium from your surfaces; too high and you get scale.
- Cyanuric Acid (CYA): 30-50 ppm. You can leave it as-is at closing since UV breakdown stops when the cover goes on.
Once chemistry is balanced, shock the pool. Use calcium hypochlorite at 2 lbs per 10,000 gallons. Say your pool holds 20,000 gallons – that’s 4 lbs of shock, added with the pump running in the evening (cal-hypo and sunlight don’t mix well). Run the pump for at least 8 hours after shocking before you touch anything else. Why 8 hours? That’s enough circulation time to distribute the shock fully and let the chlorine level drop back into a safe range before you add algaecide, which can deactivate if chlorine is above 5 ppm. Add algaecide after the shock has done its job: 1 quart per 10,000 gallons of a polyquat 60 formula is a solid standard dose.
Step 2: Remove, Clean, and Store the Cartridge Element
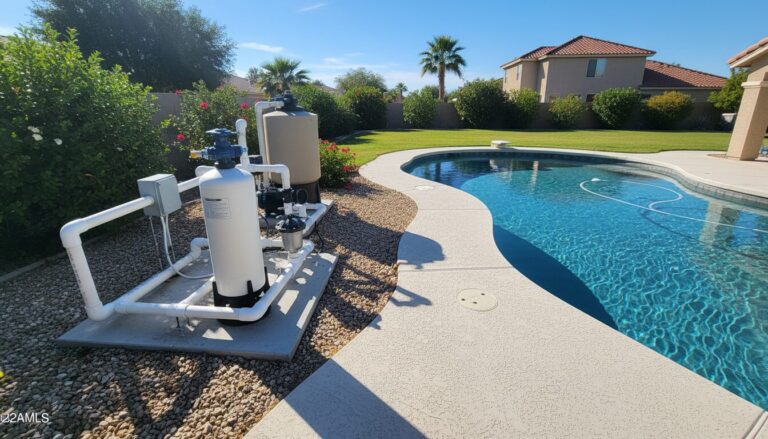
This is the step that sets cartridge filter closing apart from every other filter type, and it’s the one most people either rush or skip entirely. Water trapped inside a cartridge housing will freeze, and frozen water expands with enough force to split the housing or shred the pleated polyester element. Replacing a cartridge element runs $50-$200 depending on size; replacing a cracked housing can cost $150-$500.
- Turn off the pump and relieve pressure by opening the air relief valve on top of the filter housing.
- Disconnect the inlet and outlet plumbing at the unions (keep a towel handy – water will spill).
- Unbolt or unclamp the housing top and lift out the cartridge element.
- Rinse the cartridge with a garden hose, working from the top down between each pleat.
- Soak it in a dedicated cartridge cleaner solution for 8-12 hours to strip out body oils, sunscreen, and calcium scale that a hose alone won’t remove. AquaDoc makes a cartridge filter cleaner that pool owners use specifically for this end-of-season deep clean.
- Rinse thoroughly after soaking, then let the cartridge air-dry completely – a full 24-48 hours – before storing it in a cool, dry spot like a garage shelf or basement.
Never store a wet cartridge in a sealed bag or bin. Trapped moisture breeds mold and mildew, and you’ll open it in spring to find a cartridge that smells like a swamp. If your cartridge already shows cracked end caps, broken pleats, or heavy permanent staining, this is the right moment to replace it rather than store it. For guidance on reading those signs, this breakdown of cartridge filter wear indicators walks through exactly what to look for.
Once the cartridge is out, drain the housing completely, wipe it dry, and store it somewhere it won’t freeze – or at minimum, leave the drain plug out so any residual moisture can escape.
Step 3: Lower the Water Level
The correct water level at closing depends on your cover type. For a solid safety cover, drop the water 4-6 inches below the bottom of the skimmer opening. For a mesh cover that lets rain and snowmelt through, go 12 inches below the skimmer. Leaving water at or above the skimmer throat is a freeze-damage invitation – the skimmer body can crack, and those repairs run $200-$600 per skimmer installed.
Use a submersible pump or your filter’s waste line to pull the water down. If you’re using a cartridge system, you likely don’t have a direct waste bypass, so a rental submersible pump ($30-$50/day at most hardware stores) is the practical tool here.
Step 4: Blow Out and Plug the Lines
Blowing out the plumbing lines removes standing water that would otherwise freeze and crack your pipes – which is a far more expensive repair than anything else on this list. You need a wet/dry shop vac (on blow) or a dedicated air compressor. A compressor in the 1-2 CFM range at 20-30 PSI is enough for most residential inground pool plumbing.
- Start at the skimmer lines. Feed the air line into each skimmer, blow until you see bubbles at the return fittings in the pool, then plug the return fitting with a winter plug (rubber expansion plugs, hand-tightened).
- Move to the main drain line. Blow air through until bubbles appear, then close the main drain valve or plug it from the equipment pad side.
- Blow out any dedicated cleaner lines or water feature lines the same way.
- Once each line is blown and plugged, install a gizzmo (a plastic expansion device) in each skimmer to absorb ice pressure if any residual water remains.
For a detailed look at this part of the process, Liquid Luxury Pools has a solid walkthrough of inground pool closing that covers line-blowing in more depth.
Step 5: Add Antifreeze to Any Lines You Can’t Fully Clear
If any line has a low spot, a complex run, or a fitting you can’t blow air through confidently, pour pool-grade propylene glycol antifreeze directly into that line as insurance. Use propylene glycol specifically – it’s non-toxic. Ethylene glycol (automotive antifreeze) is poisonous and has no place near pool water. Pour 1 quart per 10 linear feet of pipe as a baseline, or check the Blue Science inground pool winterizing guide for line-specific guidance. Never add antifreeze to a line you’ve already fully blown out and plugged – it’s only necessary where you’re not certain the line is dry.
Step 6: Cover the Pool
A well-fitted safety cover or solid winter cover keeps debris out, protects your chemistry from UV and contaminants, and keeps kids and pets safe. Secure it tightly according to the manufacturer’s anchor system – a loose cover collects water, debris, and weight until it sags into the pool by February. Mesh covers need a cover pump if they accumulate standing water from heavy rainfall. If you want to know what a winter’s worth of debris and neglect actually looks like when you pull that cover off in spring, this post on winter cover buildup is a good reality check before you decide to cheap out on cover quality.
Common Mistakes to Avoid
- Leaving the cartridge in the housing: Even a small amount of trapped water will freeze and damage either the element, the housing, or both. Always remove it.
- Shocking and immediately covering: Shocking raises chlorine to 10-15 ppm. Cover the pool before that drops below 5 ppm and you’ll bleach your cover and trap off-gas under it. Wait the full 8 hours.
- Skipping the line blow-out: This is the most expensive mistake possible. A cracked return line in a concrete pool can cost $1,000-$3,000 to locate and repair. The air compressor rental is worth every dollar.
- Using automotive antifreeze: Propylene glycol only. Ethylene glycol is toxic to animals and humans and creates a serious liability if it ever enters the pool water.
- Storing the cartridge wet or sealed: Air it out completely. A ruined cartridge discovered in May, when you need it immediately, is an avoidable frustration.
Cartridge Filter Winterizing vs. Sand and DE: How They Differ
| Filter Type | Element Removed for Winter? | Housing Drained? | Backwash Before Closing? | Typical Storage Need |
|---|---|---|---|---|
| Cartridge | Yes – always | Yes, fully | No backwash port | Indoor, dry location |
| Sand | No | Partial drain via backwash | Yes, before closing | Leave assembled, drain plug out |
| DE | Grids stay in; DE powder removed | Yes, after backwash | Yes, thorough backwash | Leave assembled if freeze-protected |
The key takeaway from this comparison: cartridge filters require the most active disassembly at closing. Sand and DE systems can often be left mostly in place (with precautions), but a cartridge element sitting in a frozen housing is a guaranteed repair bill. If you’re still weighing filter systems for a future build or replacement, the differences in maintenance and seasonal care are worth factoring in from the start – this comparison of sand, cartridge, and DE filters covers the full picture.
Frequently Asked Questions
How do I winterize an inground pool with a cartridge filter?
Balance water chemistry (pH 7.2-7.6, alkalinity 80-120 ppm), shock at 2 lbs of cal-hypo per 10,000 gallons, add algaecide, then remove and store the cartridge indoors after a thorough cleaning. Lower the water level 4-6 inches below the skimmer, blow out all lines, plug the returns, add propylene glycol antifreeze to any lines you couldn’t fully clear, and cover the pool securely. The full process takes most pool owners 4-6 hours.
Do I need to remove the cartridge filter before closing the pool?
Yes, always. Water trapped in a cartridge housing will freeze and can crack both the element and the housing itself. Replacement costs range from $50-$200 for the cartridge element alone, and $150-$500 if the housing is damaged. Removing and storing the cartridge indoors takes less than 30 minutes and prevents all of that.
What chemicals do I add when closing an inground pool with a cartridge filter?
Shock with calcium hypochlorite at 2 lbs per 10,000 gallons, then add a polyquat 60 algaecide at 1 quart per 10,000 gallons once chlorine drops below 5 ppm. Make sure pH sits at 7.2-7.6 and alkalinity is 80-120 ppm before you shock. An enzyme-based winterizing product is worth adding if your pool tends to accumulate phosphate or organic debris over the off-season.
What water level should I leave in an inground pool with a cartridge filter for winter?
Lower the water to 4-6 inches below the bottom of the skimmer opening if you’re using a solid safety cover, or 12 inches below for a mesh cover. Water sitting above the skimmer line can freeze inside the skimmer body, cracking it – a repair that costs $200-$600 per skimmer.
How do I store a pool cartridge filter for winter?
Remove the cartridge, rinse it with a hose, soak it in a cartridge cleaner solution for 8-12 hours to strip oils and scale, rinse again, and let it air-dry for 24-48 hours before storing. Keep it in a cool, dry indoor location – a garage shelf or basement works well. Never seal a wet cartridge in a bag or bin, as mold and mildew will set in and can permanently damage the pleated material.
Closing a cartridge filter pool correctly comes down to one non-negotiable rule: remove the cartridge, clean it, and store it dry. Everything else – chemistry, water level, line blow-out – follows the same logic as any inground pool closing, just with the added step that makes cartridge systems a little more hands-on in fall.